A Code-Free Guide to Creating an Online Excel Database
Are you tired of managing your data in spreadsheets, but don’t have the programming skills to build a custom database? You’re not alone! Fortunately, there’s a solution that doesn’t require any coding knowledge: building an online Excel database. In this article, we guide you through the process of creating a functional and user-friendly database, step by step.
Introduction
Before we dive into the nitty-gritty of building an online Excel database, let’s go over what a database is and why you might want to use one.
A database is a collection of data that’s organized in a way that makes it easy to access, manage, and update. Databases can be used for a wide range of applications, from tracking inventory to storing customer information. While Excel is primarily a spreadsheet program, it can also be used to create databases.
So, why use an online Excel database instead of a traditional database program? Here are a few advantages:
- No coding required: You don’t need to know any programming languages to build an online Excel database.
- Familiar interface: If you’re already comfortable using Excel, building a database in it will feel like second nature.
- Low cost: Excel is a relatively inexpensive program, and you can build a database without any additional software.
- Accessible from anywhere: You can store an online Excel database on a cloud-based service like Microsoft OneDrive or Google Drive, making it easy to access and update from anywhere with an internet connection.
Now that you know why an online Excel database might be a good choice for your needs, let’s get started with the step-by-step process of building one.

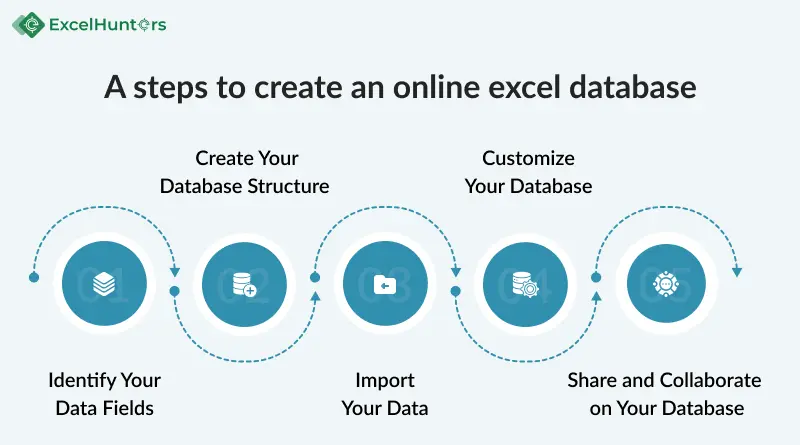
Step 1: Identify Your Data Fields
Before you start building your database, you need to identify the data fields you’ll be tracking. A data field is a specific piece of information you’ll be storing in your database. For example, if you’re building a customer database, you might have fields like “Name,” “Address,” “Phone Number,” and “Email Address.”
Make a list of all the data fields you’ll need to track in your database. It’s helpful to group similar fields together, as this will make it easier to create a logical structure for your database.
Step 2: Create Your Database Structure
Now that you’ve identified your data fields, it’s time to create your database structure. This means deciding how you’ll organize your data fields and what types of data they’ll contain.
There are two main components to a database structure:
- Tables: A table is a collection of related data fields. For example, you might have a table for customer information and another table for sales data.
- Relationships: Relationships are the connections between tables. For example, you might have a relationship between your customer table and your sales table, where each customer can have multiple sales.
In Excel, you’ll create tables using worksheets, and relationships using formulas and functions. Here’s how to get started:
- Create a new workbook in Excel.
- Create a worksheet for each table you’ll be using in your database. Give each worksheet a descriptive name, like “Customers” or “Sales.”
- In each worksheet, create columns for each of your data fields. Use clear, descriptive headers for each column.
- Once you’ve created your tables, you can start creating relationships between them. To do this, you’ll need to use formulas and functions like INDEX, MATCH, and VLOOKUP. If you’re not familiar with these functions, you can find tutorials online or take an online course to learn more.
Step 3: Import Your Data
Once you’ve created your database structure, it’s time to import your data. Depending on the size of Apologies for the confusion, here is the continuation of the article:
your database, you may be able to manually enter your data into each worksheet. However, if you have a large amount of data to input, you may want to consider importing your data from an existing source, such as a CSV file or another Excel workbook.
To import your data into your database:
- Open the worksheet you want to import data into.
- Click on “Data” tab in the Excel ribbon.
- Click on “From Text/CSV” if you’re importing data from a CSV file, or “From Workbook” if you’re importing data from another Excel workbook.
- Follow the prompts to select your file and configure your import settings.
- Once your data is imported, you may need to make some adjustments to ensure it’s formatted correctly and matches the structure of your database.
Step 4: Customize Your Database
Now that you’ve built the foundation of your online Excel database, it’s time to customize it to meet your specific needs. Here are a few customization options to consider:
- Formatting: Use conditional formatting highlight important data or to visually distinguish between different types of data.
- Filtering and sorting: Use filters and sorting to quickly find and organize your data.
- Pivot tables: Use pivot tables to summarize and analyze your data in different ways.
- Macros: Use macros to automate repetitive tasks or to add custom functionality to your database.
To access these customization options, you’ll need to use Excel’s built-in features or create your own macros using Visual Basic for Applications (VBA). If you’re not familiar with these tools, there are many online resources and tutorials available to help you get started.
Step 5: Share and Collaborate on Your Database
One of the biggest advantages of an online Excel database is that it can be easily shared and collaborated on with others. Here are few ways to share your database:
- Cloud storage: Store your database on a cloud-based service like Microsoft OneDrive or Google Drive, and share it with specific users or groups.
- Sharepoint: Use Microsoft Sharepoint to share your database with others within your organization.
- Web app: Convert your database into a web app using a tool like AppSheet or PowerApps, and share it with anyone with an internet connection.
When sharing your database, be sure to consider security and access controls to ensure that only authorized users can access and modify your data.
Frequently Asked Questions
Can I build an online Excel database for free?
Yes! Excel is a relatively inexpensive program, and you can build a database without any additional software. However, you may need to pay for cloud storage or other services if you want to share your database with others.
Do I need programming skills to build an online Excel database?
No! One of the advantages of using Excel to build a database is that you don’t need to know any programming languages. However, you may need to learn some advanced Excel functions and formulas to create more complex databases.
How do I import data into my online Excel data base?
You can import data from CSV file or another Excel workbook using Excel’s built-in import tools. Simply follow the prompts to select your file and configure your import settings.
Can I customize the appearance of my online Excel database?
Yes! You can use conditional formatting, filters, sorting, pivot tables, and macros to customize the appearance and functionality of your database.
Can I share my online Excel database with others?
Yes! You can store your database on a cloud-based service like Microsoft OneDrive or Google Drive, or convert it into a web app using a tool like AppSheet or PowerApps. Be sure to consider security and access controls when sharing your database.
ExcelHunters is a website that offers a range of Excel-related services, including consulting, training, and custom solutions. Their team of experts has years of experience working with Excel and can help you optimize your workflows, automate repetitive tasks, and build custom databases and applications. Whether you’re a business owner, analyst, or Excel enthusiast, ExcelHunters can provide the support and expertise you need to take your skills to the next level.
Looking for
Consultations?Our Expertise
- 8 + years of experience
- Adept Developers
- Excel at Agile Development
- Cost-Effective


